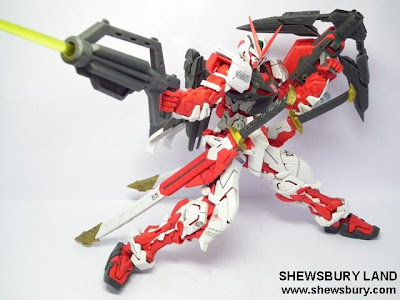
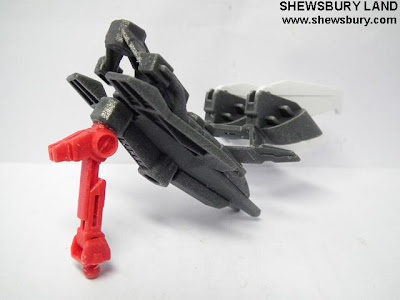
Gundam Astray Red Frame Kai Shewsbury Custom

This is actually our previous 1/100 MG Gundam Astray Red Frame Kai (MBF-P02KAI) that we reviewed here back in March 2010.
The original look before modification;

As you can see from the above photos, that is initially how the Red Frame Kai looks like but I personally dislike the look of that back pack when I attached it onto the Red Frame's body.... I think it's kind of sucks... The function is great though with the exception of that giant blade coz it is damn heavy anyway...
So last Sunday, I happen to wake up early - at 11.30am - and suddenly I just grab the Red Frame and say to my self, let's do something with the back pack...
No planning, no sketches or drawing, no idea of what will happen... just do it... typical engineering idea of Shewsbury Land... and in worst case scenario, just throw it away... simple as that...
And after 2 hours this is the result...

Gundam Astray Red Frame Kai Shewsbury Custom, now this guy have a simpler and lighter back pack that still able to give him the extra boost in speed and agility and he can now always have the beam rifle at his disposal plus a bonus of Composite Shield to protect him from enemy's attack and it can also change into Claw Mode, Axe Mode and Crossbow Mode...


See, all these stuff are actually from those big mega back pack...


Even after the "trimming process" - it still maintained the original adjustable movement range


Most important is it is pretty much lighter now...

The Composite Shield, I get the idea from Blitz Gundam and Providence Gundam...


Basically I just use super glue and Tamiya cement to stick those 2 things there....


One of them will be plug into the hole on the arm near the elbow, this is the most important attachment method as it will handle the weight and ensure stability...


While the one on the hand are merely for cosmetic purpose and not so important in fact but still nice to have and nice to see...

No changes what so ever on this one... basically now it will become beam rifle...

As for this part... it is excluded from the "Shewsbury Custom" project for now... I will just keep this for future project maybe... I think this can be modified into some sort of giant spear...

So this is it... Red Frame Kai Shewsbury Custom in action....

Shooting... phew phew boom...


The Composite Shield in Claw Mode...

The Composite Shield in Axe Mode...

The Composite Shield in Cross Bow Mode... all you need to do now is put that yellow laser or beam effects part there...


The back pack in flying mode...

The back pack in idle or stand by mode...

Some additional action pose... from this photo, the Composite Shield in Cross Bow Mode looks quite cool...


You can choose to display the Composite Shield in what ever form you like...


Overall, I'm quite happy with this "random" simple modification as it happens without any planning or direction what so ever... the approach is "just do it and see what happen later"
If you dislike with that heavy back pack of your MG Gundam Astray Red Frame... don't just sit and do nothing but complaining about it.... do something... most important is, you happy with it..
I'm sure many some of you can plan and do better modification than what I did here... so good luck with it... our MG Gundam Astray Red Frame Shewsbury Custom can now live happily ever after and be proud standing on my coffee table... at long last.. he got a unique shield...


Haha, nice mods! I like the shield's simple design over the huge TA.... I don't really like the TA, and yet I still bought this kit, lol.
ReplyDeleteYES THIS IS 1 HELL OF CLAW !
ReplyDeleteFor the TA blades, why not re-use just like BF 2nd Revise's dual blade then ? No need to waste bah. =)
Woot at all super glued parts. ^^"
Nice! I love the composite shield ^^
ReplyDeleteToo bad this kit doesnt come with it's original backpack... :(
Nice mod! but the backpack looks dull.. maybe you can use the spare part on tactical arms on the backpack to look like aile strike/impuse look!
ReplyDeleteI really like your backpack mod.
ReplyDeletehey you know the blades are of 2 parts right?
ReplyDeleteremove the top part [the tip] the let the handle and the plug come out and remove the white parts it will look like a rifle. If you want a pic of how it will look like, email me at bluesky579@hotmail.com! good work though!